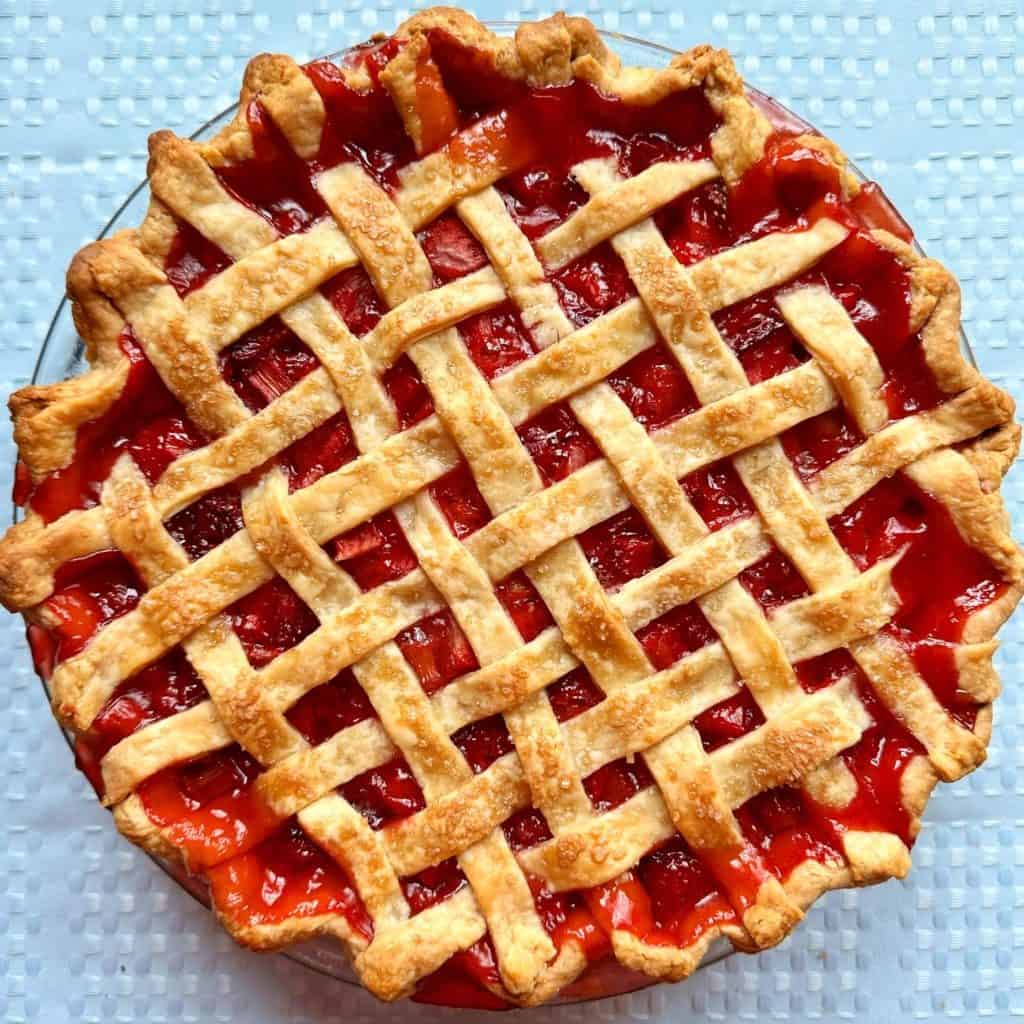
Lattice Top Pie Crust Recipe with Tutorial
The lattice top is the prettiest pie crust around! And you don’t need to strive for perfection here, it’s the imperfections that make it look authentic.
Making homemade pie crust gets a bad rap as difficult, but it’s really not so bad! I’ve done my best to give detailed instructions below.
A note on substitutions: this recipe calls for butter only. If you want to make the recipe vegan, you can substitute vegetable shortening for the butter. And if you are a first timer and want to make the dough a little easier to work with, you can substitute half the butter with vegetable shortening.
The best way to explain how to make a lattice top pie crust is through pictures! So here is a step-by-step tutorial with accompanying photos!
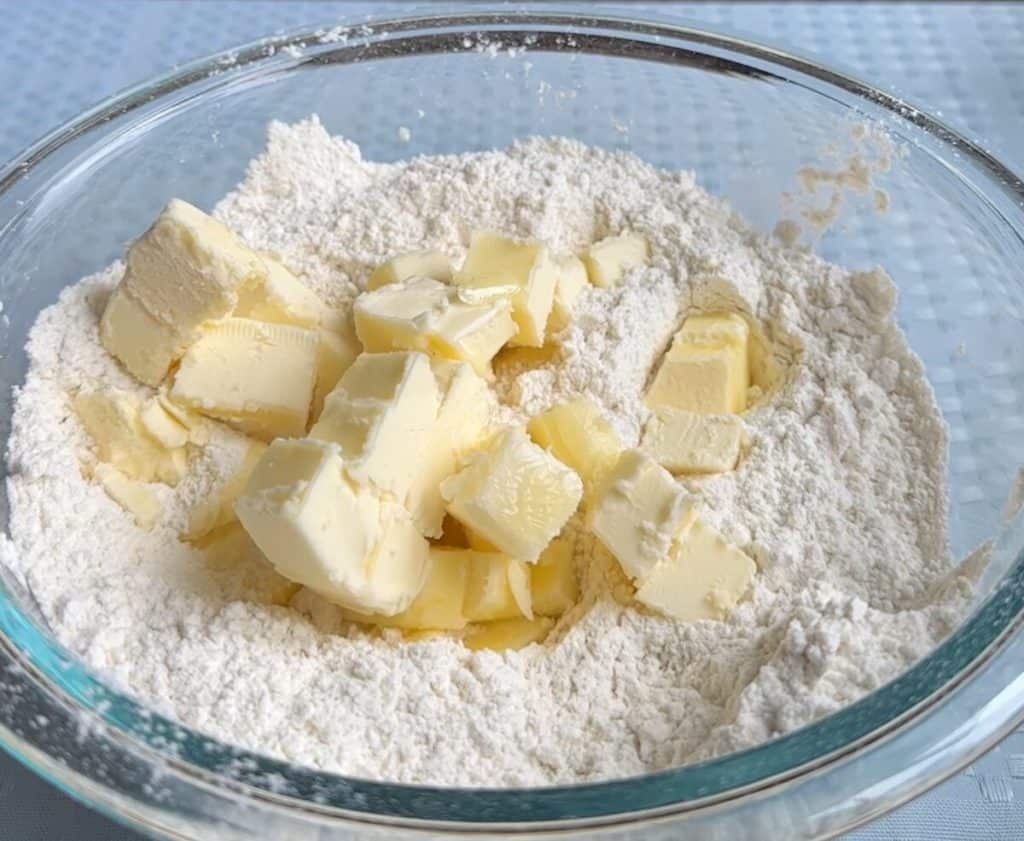
Step 1: Combine the flour, sugar and salt in a large bowl. Scatter the butter cubes over the dry ingredients and toss to mix.
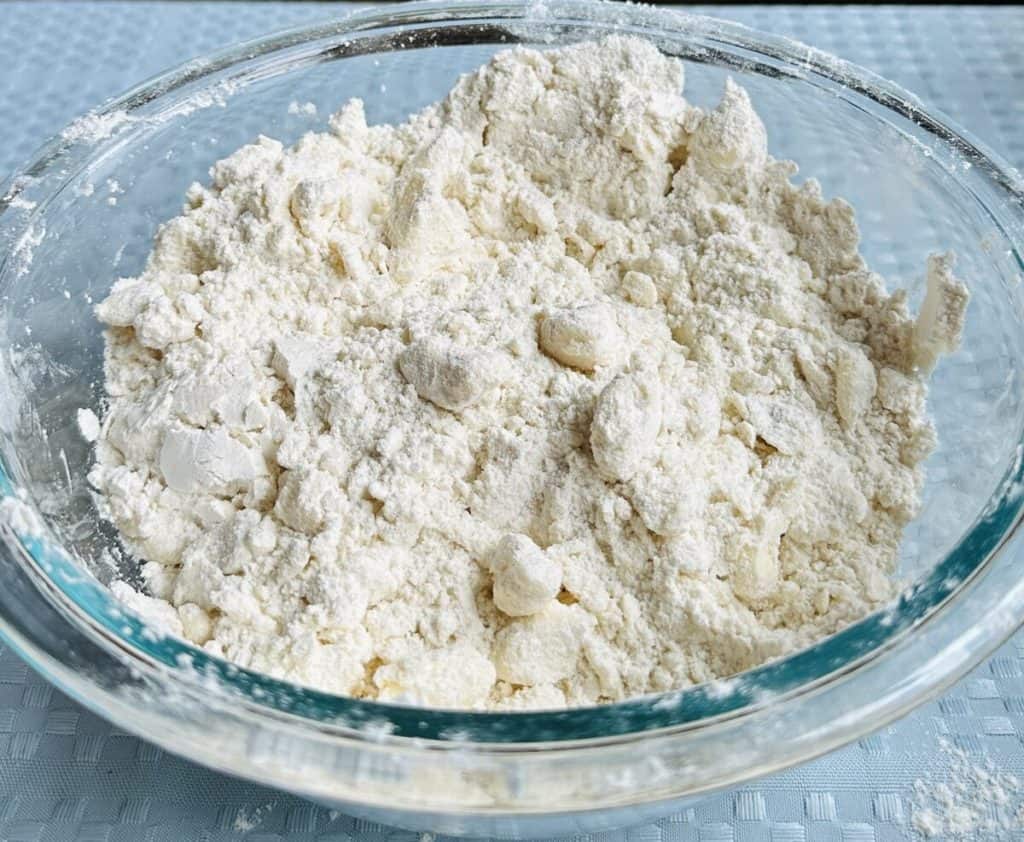
Step 2: Using a pastry blender (or a large fork), cut the butter (and/or vegetable shortening, if using) into the flour mixture until it is crumbly with pieces the size of small peas.
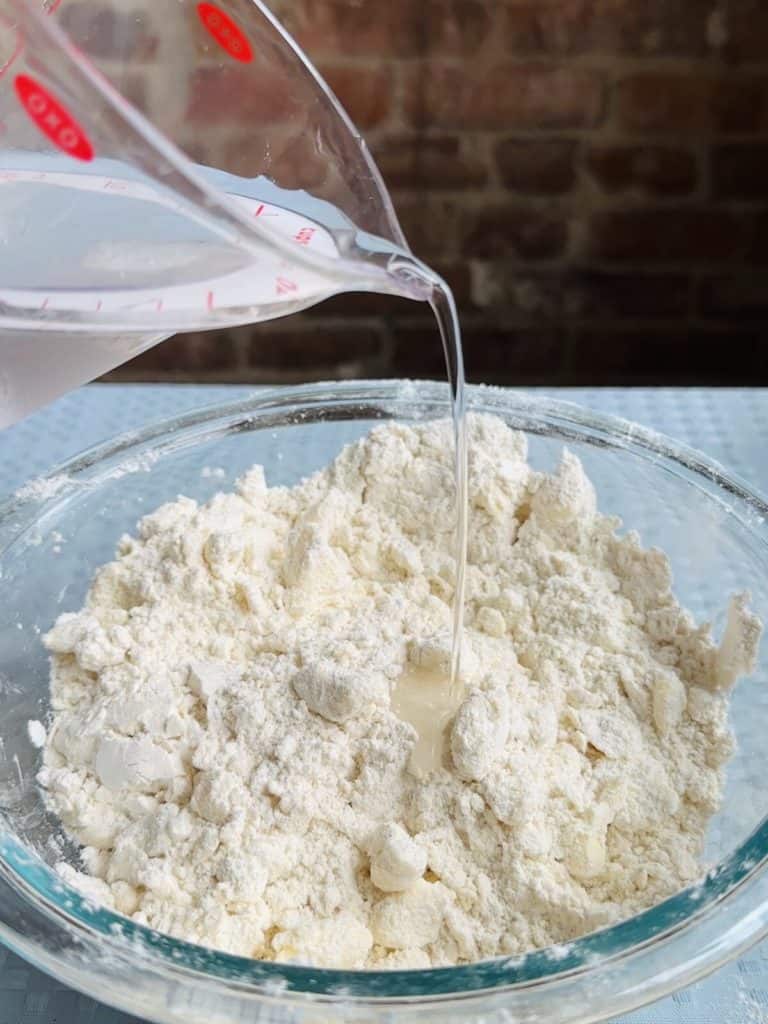
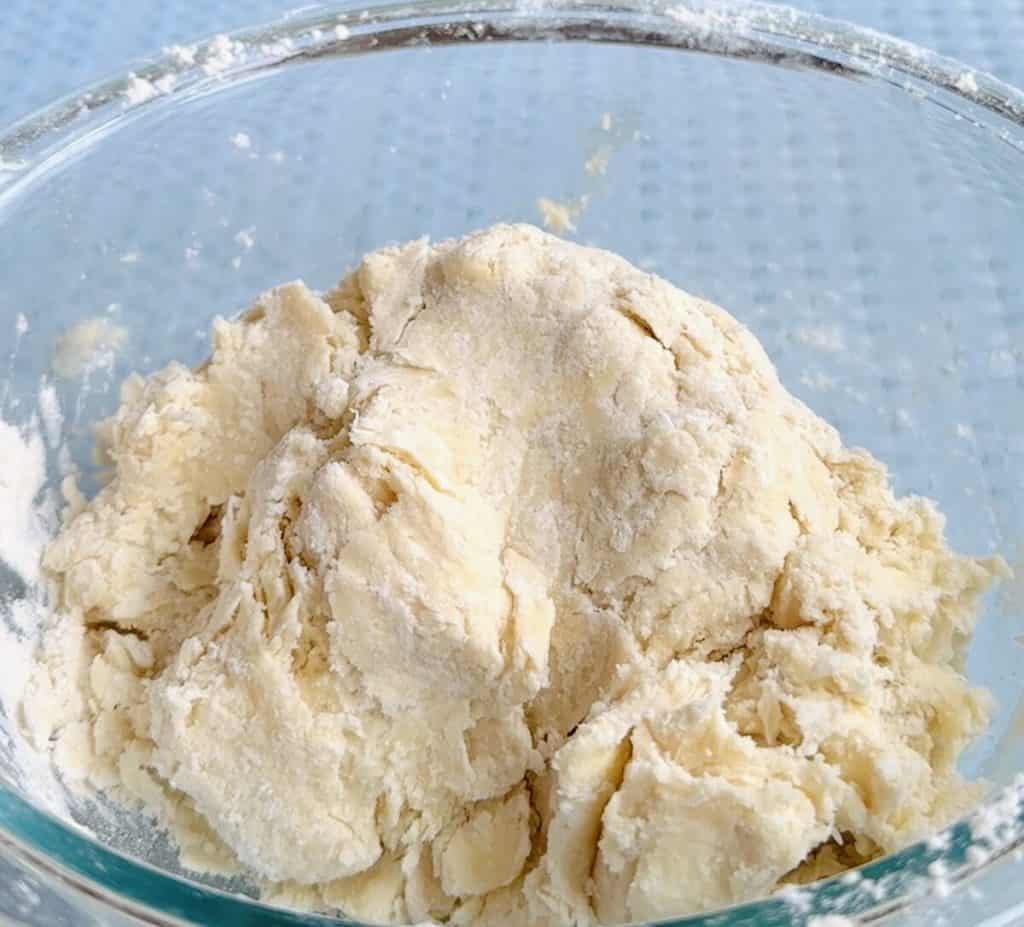
Step 3: Drizzle half of the water over the mixture and toss well with the blender or a fork to dampen. Add the remaining water a little bit at a time, and continue to toss, making sure to incorporate the dry parts of the mixture at the bottom of the bowl.
Note: if your dough is still very dry at this point, add 1 or 2 teaspoons of water at a time until the pastry starts coming together.
Step 4: Using your hands, pack the pastry into a ball. Then cut off about 1/3 of that ball and roll into a smaller ball.
Step 5: Knead each ball once or twice, just to bring together, and then flatten the balls into ¾-inch-thick discs. Wrap the discs in plastic wrap and refrigerate for at least an hour (or overnight).
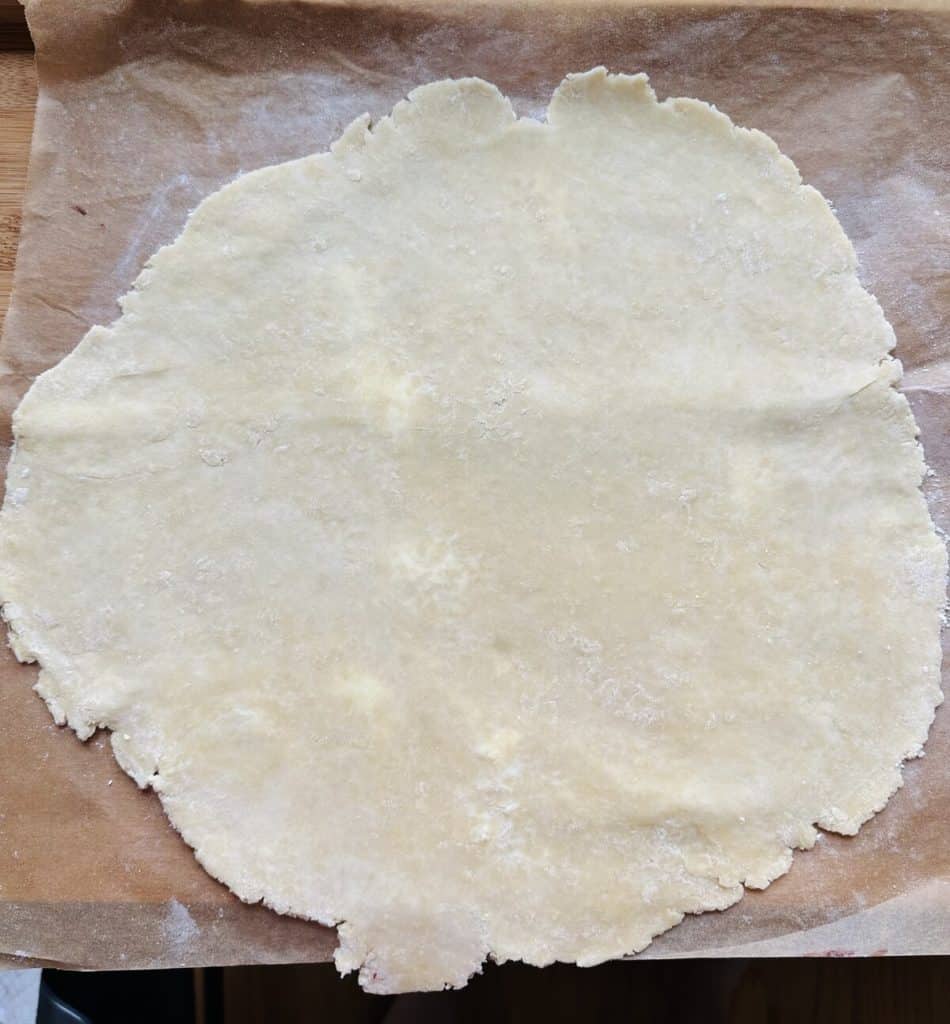
Step 6: Remove dough from refrigerator and allow to warm up a bit if it was refrigerated overnight (you won’t be able to roll it out if it’s rock hard!). Once it becomes pliable, roll out each disc on floured piece of parchment paper.
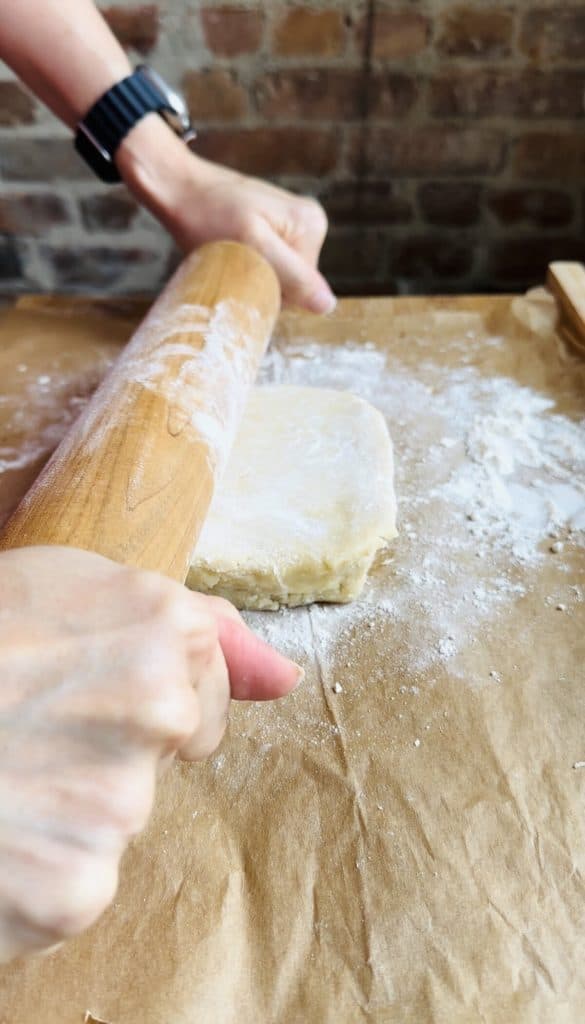
Note: You are looking to form a large circle and a small circle with the respective discs. You can check the size of the larger circle by inverting your pie plate to make sure the circle of pastry is large enough to cover the pie plate with a bit of overhang. The smaller disc you will be cutting into strips so the strips (and hence the circle) will need to be long enough to cover the top of the pie.
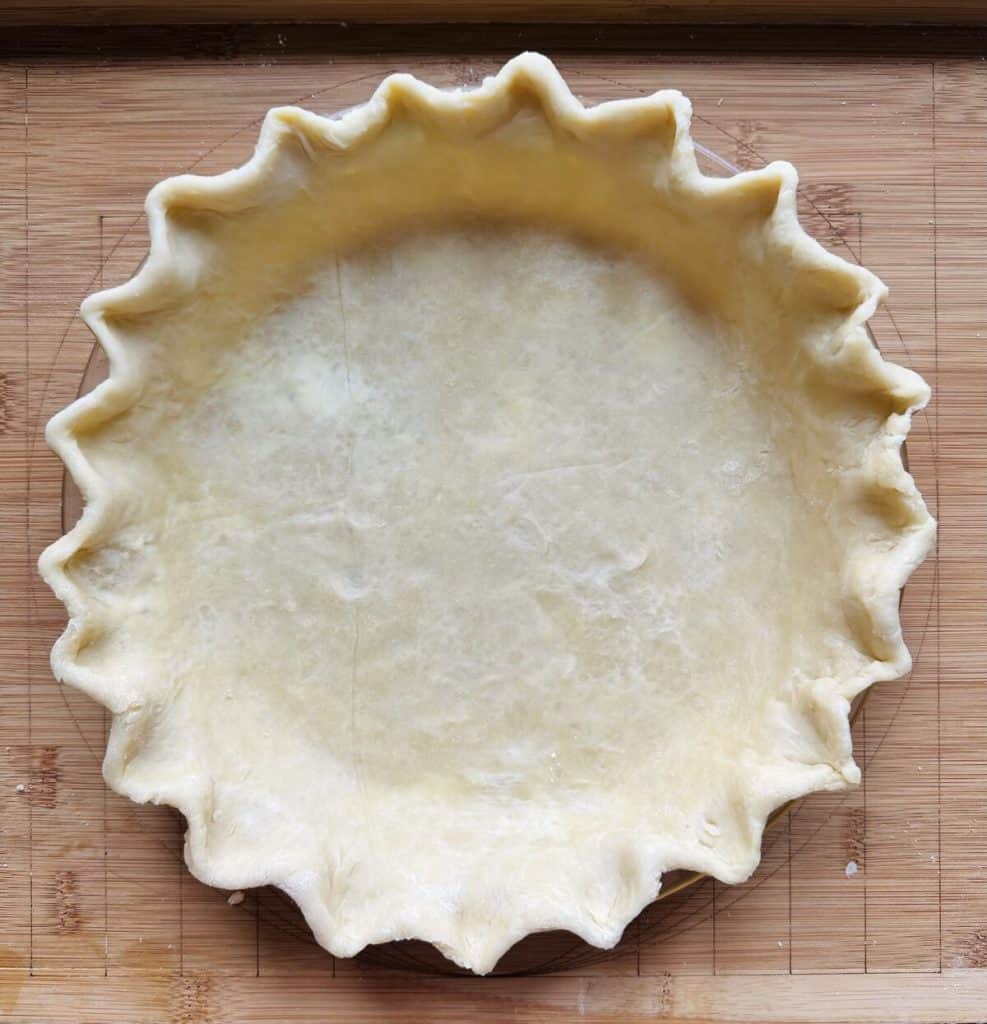
Step 7: Invert the large circle into a pie plate.
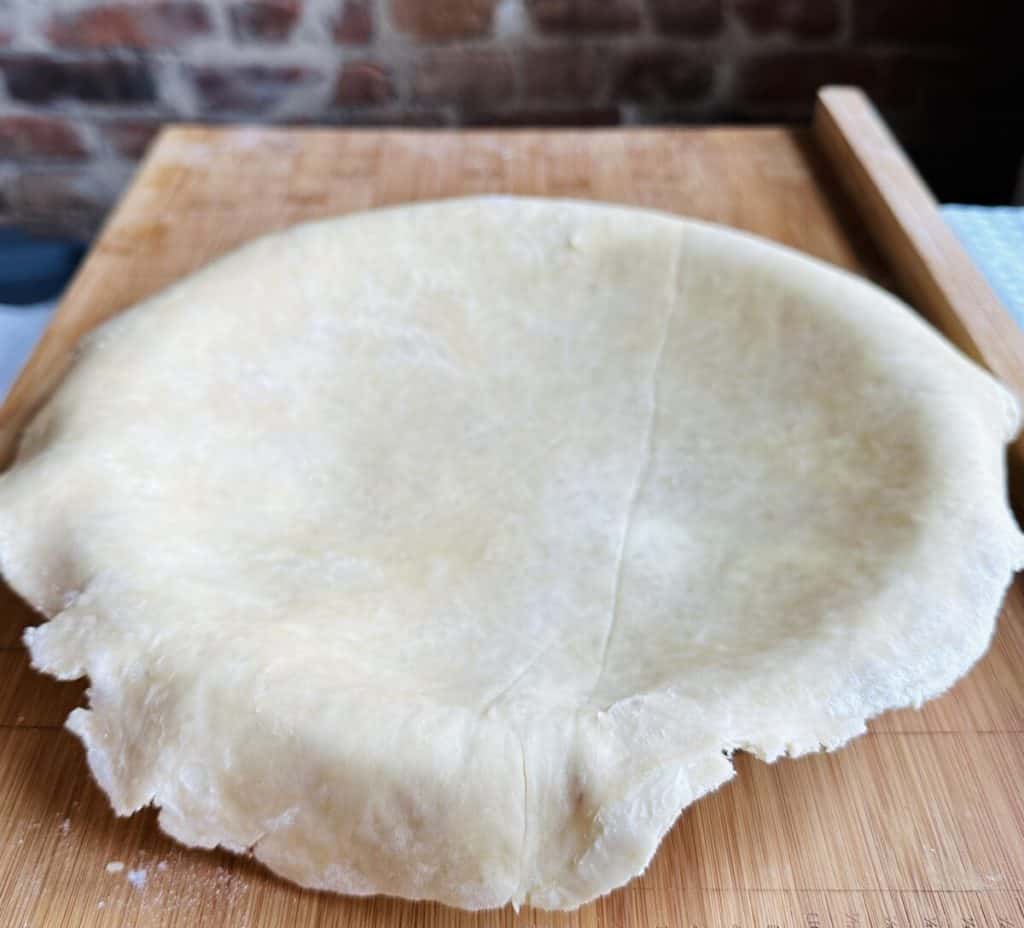
Step 8: Sculpt the edges using your thumbs and pointer fingers.

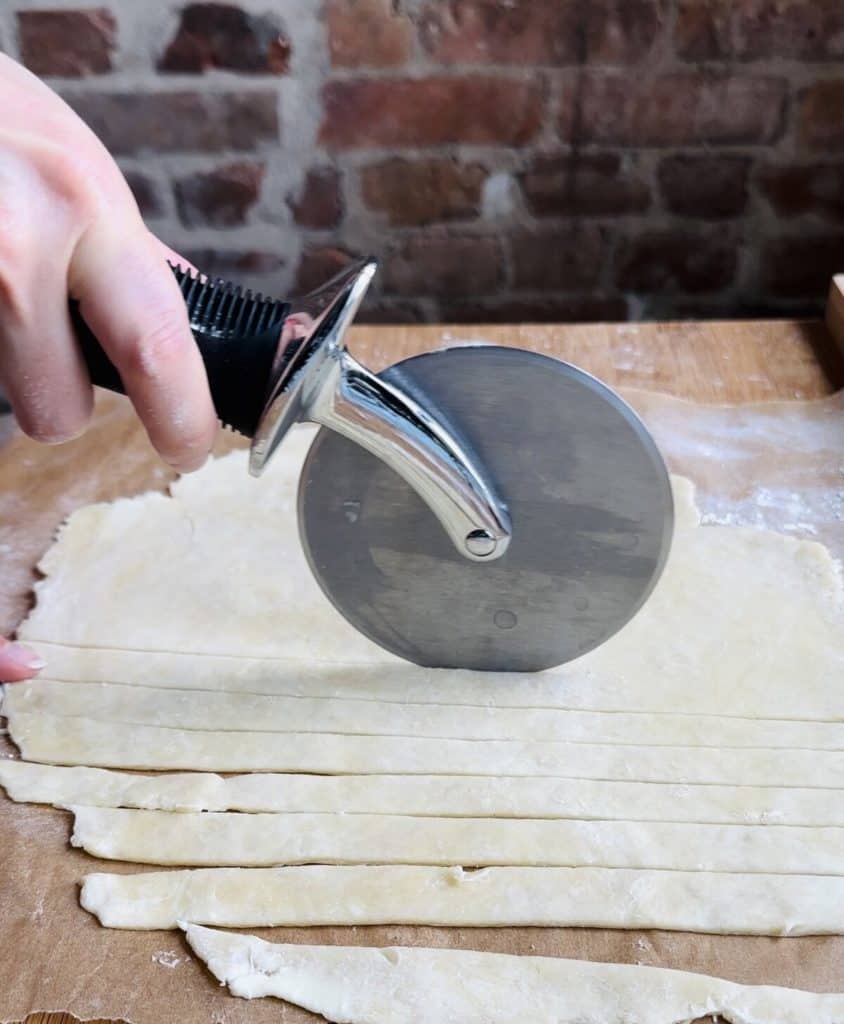
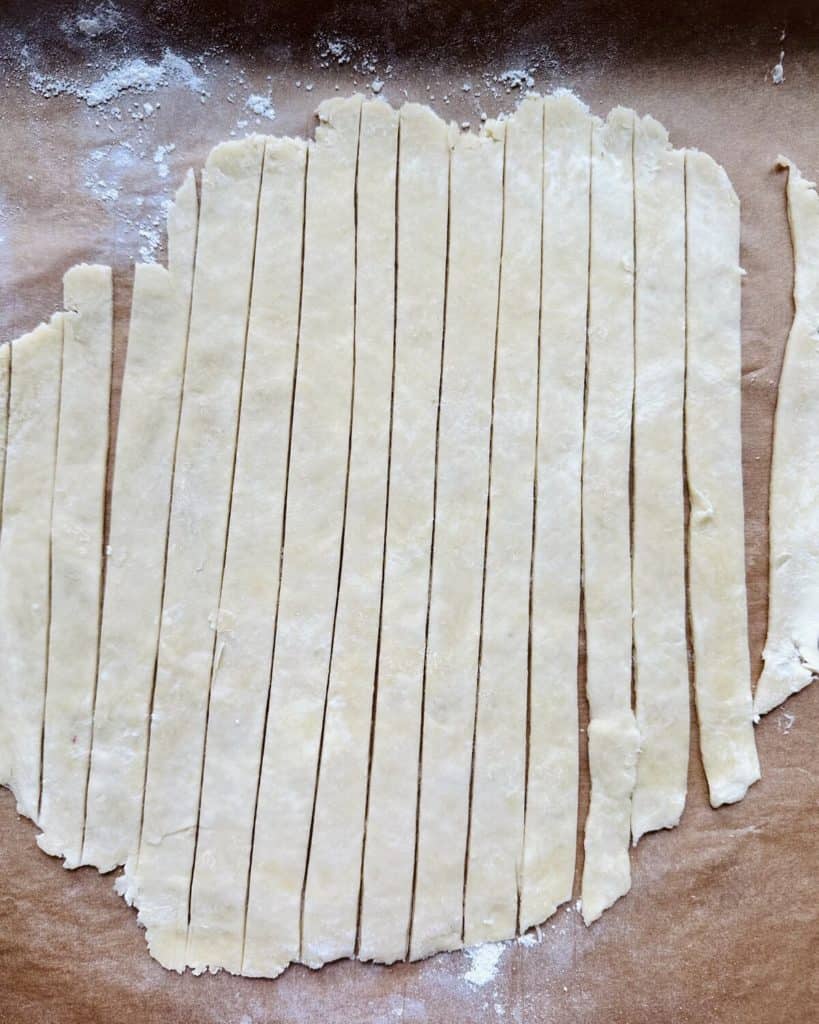
Step 9: Using a pizza cutter wheel or a sharp knife, cut the smaller circle into strips.
Step 10: Put both the pie plate (with crust in it) and the strips of pastry into the refrigerator while you prepare the pie filling.
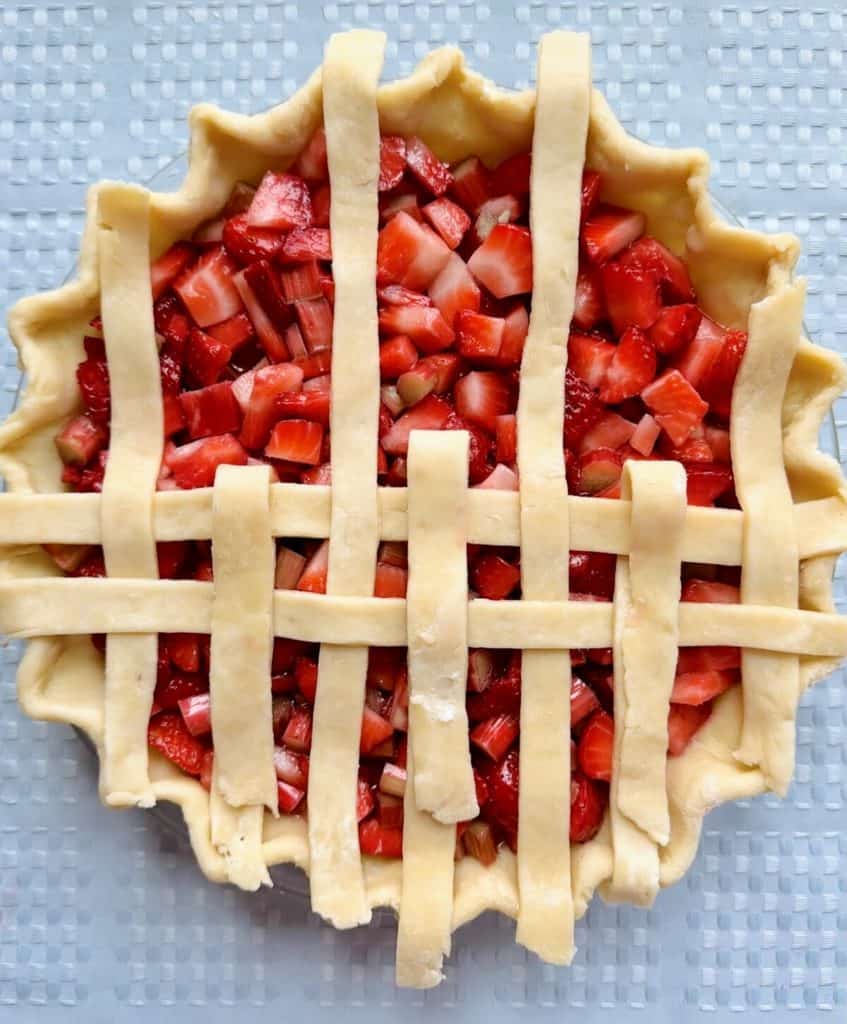
Step 11: Once the filling is prepared, remove the pie crust from the refrigerator and pour the filling into the crust. Then, choosing strips based on the length you need, start placing strips of crust going in one direction.

Step 12: Fold back every other strip.

Step 13: Place a new strip across the existing strips right under the fold

Step 14: Unfold the folded strips, and repeat until the lattice top is complete!


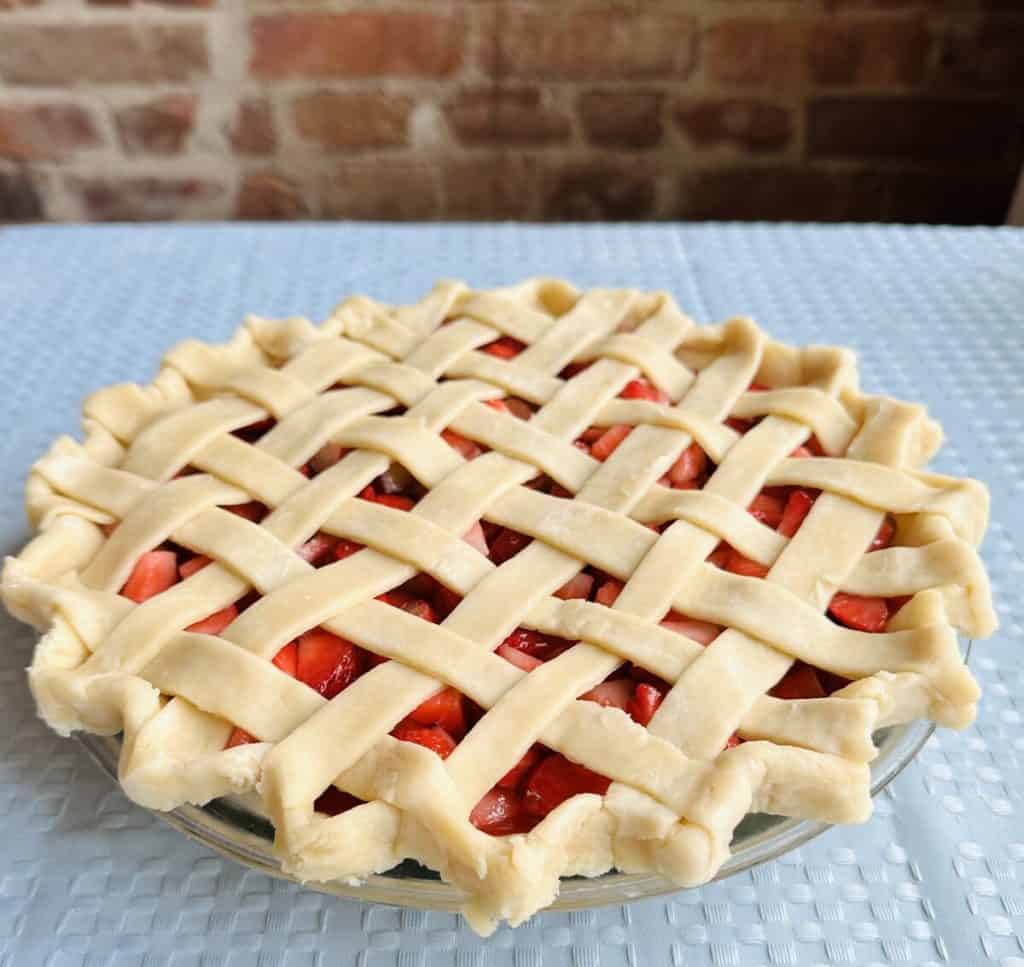
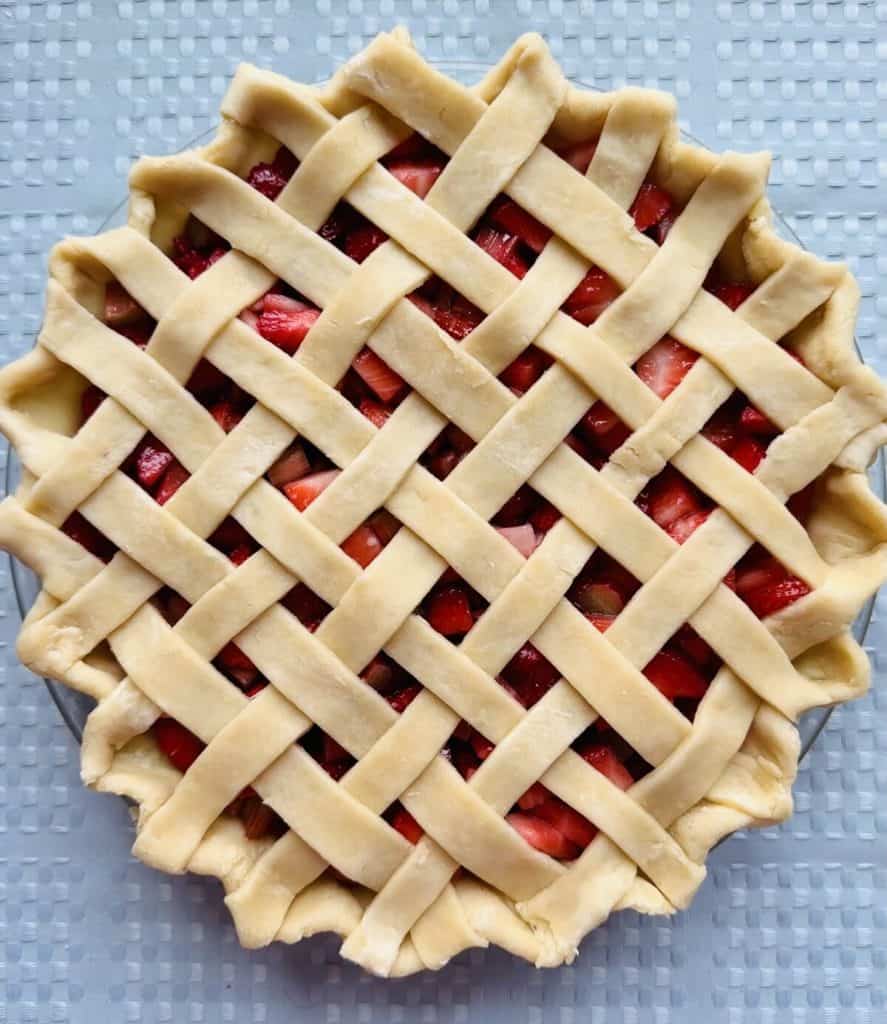
Step 15: Make sure to connect the sides of the pie crust to the ends of each strip for a cohesive look, and bake according to the pie recipe instructions!

Lattice Top Pie Crust
Equipment
- pastry blender optional
Ingredients
- 2 ¼ cups all purpose flour
- 2 ¼ tsp sugar
- 1 tsp salt
- ¾ cup unsalted butter, cold
- ¼ cup + 2 tbsp ice water
Instructions
- Combine the flour, sugar and salt in a large bowl. Scatter the butter cubes over the dry ingredients and toss to mix.
- Using a pastry blender (or a large fork), cut the butter (and/or vegetable shortening, if using) into the flour mixture until it is crumbly with pieces the size of small peas.
- Drizzle half of the water over the mixture and toss well with the blender or a fork to dampen. Add the remaining water a little bit at a time, and continue to toss, making sure to incorporate the dry parts of the mixture at the bottom of the bowl. Note: if your dough is still very dry at this point, add 1 or 2 teaspoons of water at a time until the pastry starts coming together.
- Using your hands, pack the pastry into a ball. Then cut off about 1/3 of that ball and roll into a smaller ball.
- Knead each ball once or twice, just to bring together, and then flatten the balls into ¾-inch-thick disks. Wrap the disks in plastic and refrigerate for at least an hour (or overnight).
- Remove dough from refrigerator and allow to warmup a bit if it was refrigerated overnight (you won’t be able to roll it out if it’s rock hard!). Once it becomes pliable, roll out each disc on floured piece of parchment paper.Note: You are looking to form a large circle and a small circle with the respective discs. You can check the size of the larger circle by inverting your pie plate to make sure the circle of pastry is large enough to cover the pie plate with a bit of overhang. The smaller disc you will be cutting into strips so the strips (and hence the circle) will need to be long enough to cover the top of the pie.
- Invert the large circle into a pie plate and then sculpt the edges using your thumbs and pointer fingers.
- Using a pizza cutter wheel or a sharp knife, cut the smaller circle into strips.
- Put both the pie plate (with crust in it) andthe strips of pastry into the refrigerator while you prepare the pie filling.
- Once the filling is prepared, remove the piecrust from the refrigerator and pour the filling into the crust. Then, choosing strips based on the length you need, start placing strips of crust going in one direction.
- Fold back every other strip, and then place a new strip across the existing strips at the place of the fold.
- Then unfold the folded strips, and repeat until the lattice top is complete!
- Make sure to connect the sides of the pie crust to the ends of each strip for a cohesive look, and bake according to the pie recipe instructions!


